Key Requirements In A Wedding Photographer

Best Wedding Photography Tips For Beginners

You just booked your first wedding.

Now what?

Maybe you’re feeling a little nervous – worried about lighting the reception, posing a slightly-awkward couple, or choosing the right lens for the ceremony.

We’re not going to help you with any of that. Time, experience, and experimentation will earn you your style and technique.

To rock your first wedding, there’s one thing you must do: prepare for chaos. These wedding photography tips for beginners will help you do just that!

Tip #1: Make It Legal

One of the biggest beginner mistakes a photographer can make when photographing weddings is not having a signed contract. When you have a legally binding contract, it sets an agreement between you and the client.

When your client signs a contract, it means they agree with your role and responsibilities for the wedding. The contract clearly states your tasks and what your clients will receive. It serves as a protection to both parties, especially since there’s money involved.

If you haven’t already, make your booking legit with a signed contract and paid retainer. You can do both through ShootProof, using an attorney-drafted contract template from ShootProof’s Marketplace and the Invoices feature.

If you’ve already collected a signed contract and retainer: congratulations! Level up!

Tip #2: Keep Your Lines of Communication Open

Behind every scheduled wedding photography shoot is a series of inquiries, bookings, and payment discussions. It all starts with effective communication so that you can do all the necessary preparations and set expectations with the client. Make sure that clients have a way to contact you; may it be through phone, email, or social media.

Respond Quickly

When you’re just starting out, it can feel scary replying to messages. There are cases when the client won’t respond right away, which might make you nervous that you said something wrong.

Don’t worry, this is normal. Remember, your couples are in the middle of planning a wedding, so they have a lot going on! Even though they might take awhile to reply to you, it’s important that you focus on answering them as quickly as possible. The better the experience you provide them throughout the process, the more likely they are to refer you to friends!

Send a Questionnaire

Leading up to the wedding, send your couple a detailed questionnaire asking questions to help you fully understand what will be happening on their wedding day. Make sure you know exactly what time coverage begins, the locations you need to be throughout the day, the names of important family members and those in the wedding party, any specific images your client envisioned, and when coverage ends.

Additionally, use questionnaires to learn more about your couple. Find out where they met, their proposal story, and why they chose their specific wedding venue. All of these unique details are great to use when creating a blog post after the event!

Set Up a Meeting

About 2-3 weeks out from the wedding, set up a meeting to connect with your couple. This can either be done in person or on a FaceTime call, depending on what’s most convenient for them and you.

It’s great to actually have face-to-face time with your client before the big day, especially if you didn’t do an engagement shoot with them. This gives you an opportunity to review the timeline in person, ask them any last minute questions, and help relieve any nerves they might have.

Tip #3: Cooperate With Other Vendors

Other wedding vendors are going to be your best partners at the event. They can either make the job easier or harder, so it’s important that you treat them with respect throughout the entirety of the event. After the event, you can continue building a relationship with them for future weddings!

Tip #4: Hire An Assistant

No, not a second shooter (though you may have one of those, too). Hire an assistant.

Your photo assistant can:

  • Carry and/or guard your gear
  • Help set up equipment if you’re using lights or tripods
  • Smooth trains, fluff hair, and re-pin boutonnieres
  • Bring you a bottle of water so you don’t pass out

Tip #5: Prepare Your Emergency Kit

An emergency kit can help streamline the photography process and enhance your clients’ experience!

Larger emergency kits may contain rain ponchos, first aid kits, bug spray, crochet needles (for dress buttons), makeup basics, spare bow ties, lighters, a list of emergency phone numbers (backup vendors and photographers), and more. Your imagination is the limit!

Don’t overburden yourself but pack what makes you feel prepared and comfortable. Your assistant can help you manage this extra bag!


Groom’s Preparations

Sidelight for males works well

Men look great when lit from the side, even if the light is harsh. An easy way to accomplish this is to find a window with light streaming through it, then expose for the highlights.

When I’ve found an interesting composition with my camera settings dialed in, I’ll get the groom in place, and either get them to look out the window, or if the sun is too harsh, fiddle with their pocket square, watch, or whatever else that feels natural to them.

Try the Gangta-Groomsmen* shot

Similar to the tip above, I’ll take the groomsmen into the harsh morning light and position them all so that the sun is hitting part of their face.

Then it’s just a case of underexposing so the highlights are preserved and the shadows are black, and instructing the groomsmen to pretend they’re bouncers on a nightclub door!

This is also a handy way to disguise whatever ugly background they’re standing near, since everything without the sun hitting it falls into complete darkness.

Get the groom used to your proximity

This applies to the bride as well, but if you’re an up-close-and-personal photographer with your 35mm or 24mm lens, it’s good to get the client used to your proximity nice and early.

Since grooms won’t be sitting still having make up applied, it can feel awkward for you when you try to get really close to him for the shot.

Just like you did with the bride, you can explain that “often I won’t even be photographing you, but rather, I’ll be shooting the person in the background.”

When the groom is used to you being close, the rest of the day will pass much more comfortably for both you and him, and you’ll be able to get those candid, real moments you’re aiming for.


Buffer Your Schedule

Falling behind with your schedule is very detrimental on how many images you may receive. As you can imagine, delays can be stressful and won’t be very fun. There will always be something that will come up that will cause you to rearrange your plans. If you allot additional time creating the schedule for your day, you’ll be in a much better place when the unforeseen happens. Hair and Make-up are notorious for consuming more time than planned. Additionally, some tasks that may seem small could potentially take much longer than anticipated. Late bridal party members, late flowers, someone forgetting something, etc can all cause the schedule to come to a pause.

Begin Early

Time and time again the biggest hang-up we see is couples beginning to get ready far later than they need to be. Prepare for the unexpected by allowing yourself extra time for your wedding day. The earlier that you are dressed and ready to go, the more photographs can be taken. There is a dramatic difference in the amount of portrait photographs that you’ll receive between couples who begin photos early and those who schedule with just a minimum amount of time.

Start your wedding day early. Just do it. You’ll be more relaxed, you’ll remember more, you’ll enjoy yourself, and it’ll counter any schedule issues that may arise. If you end up having extra time, kick back with your bridal party over some champagne. Beginning your day early


HAVE A ‘FIRST LOOK’

We love first looks because they’re incredibly intimate and special, allowing the couple a few moments alone with each other in an otherwise crowded and busy day. First looks typically happen in a quiet area, away from guests, bridal party members, and family. We set up the groom facing away from the bride. We then have the bride approach him from behind and tap on the shoulder. It always provides a great moment between the couple.

The First Look is by far the best way to leverage time for your wedding day. Scheduling one earlier in the day will allow for freedom for you and your photographer to grab many of the portrait shots that traditionally occur after the ceremony. The last big plus for a first look is that you’ll be able to transition from the ceremony to reception quickly, preventing the guests from having to wait around too long for the bride and groom to be introduced. We do, however, recommend a quick 10-30 min shoot with just the couple between the ceremony and reception.

Schedule For The Best Light

Good light is a photographer’s best friend. To make the most of your bridal photos, schedule the time for couple portraits within the golden hour. This is the hour before sunset and it provides gorgeous, warm, and flattering light. Typically, the best time to schedule this is between the ceremony and your reception entrance.

In contrast, scheduling your portraits around noon is far more difficult for your photographer to create beautiful imagery. Harsh, mid-day sun creates heavy shadows, and since during noon the sun is directly above us, it creates raccoon-eye shadows which are unflattering. If you absolutely must schedule your portraits around noon, ensure that there a fair amount of even shade available for your photographer to work in.


Choose A Great Location / Venue

When selecting your ceremony and reception location try to keep an eye out for the photographic potential of the venue. A good photographer will be able to give you amazing images anywhere, but a sexy venue that fits your personality will be icing on the cake. Do a bit of research on venues you’re looking to book. Preview other photographers’ works who’ve shot there and see if the images they created are in line of what you’re looking to receive from your photographer. Additionally, look for variance in your venue. If portions of the venue differ from others, for example, one area of the venue is classy and elegant, where outside on a wall it might be a really great textured brick, that will provide you with a great variety in the images you receive.

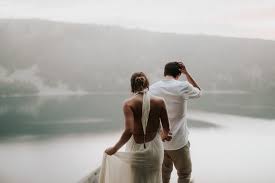
Have An Engagement Session

Other than receiving great engagement photos, an engagement session acts as bonding between the photographer and the couple. The photographer gets a chance to see the couple’s personality and how they react in front of the camera. The couple can experience how it is to be photographed together and to become comfortable being photographed. Think of engagement sessions as practice for the wedding day.

If you’re unable to have an engagement session or simply do not wish to have one, I would strongly recommend that the two of you meet up with your photographer in some other way to become familiar – an example could be having dinner together. The more you know your photographer, the more relaxed you’ll be during the wedding.

Event Planner Think, Feel And Treat Each Event As Their Own

What is the importance of event planning?

Invest in event planning not just event marketing

Many organizations, especially nonprofits and associations, focus on having one annual event that is meant to be a fundraiser or a idea-raiser.  Events are a great way to publicize an organization, get people together, and provide value to attendees. Except when the events don’t go well. And that is a big exception.

Unfortunately,  many events have better publicity than planning, and that is guaranteed to backfire. What I mean is that event organizers spend inordinate amounts of time and money to make sure that people know and attend a conference, and spend much less time and money on the logistics of the event.

Lesson: Make sure the details are correct, and that everyone has the same information.

The people who were involved with greeting and registering were doing neither when I arrived at 8:50. Badges were still being put out. No one handed me a program. It was disorganized.

The program did not start until 10:15. From there, everything ran late. No one thought to tell people where the breakout sessions would be, and one was on a different floor (the session I was signed up for).

Lesson: Timing matters.

The “panelists” for the session I attended were sitting and chatting amongst themselves for 25 minutes, ignoring the fact that 40 people were sitting and waiting for them to start.

Lesson: Explain expectations to presenters.

And then there was the issue of lunch. It was supposed to be “grab and go.”  I am vegetarian and guess what, there was not a single vegetarian option to be found.

Lesson: If you are going to offer food (and there is no other food available on site) then you have to consider dietary restrictions.

The bottom line is that the event organizers did not pay attention to the organization aspect of running an event. While I am sure that some people got some value from this particular event, these lapses in logistics wasted my time (and my money).


Why is event planning important?

It is important because it is your guideline towards effective production. Event planning involves the A to Z procedure, equipment, team, and all aspects making up the event. Let me give you an example: when you decide to travel, don’t you have a plan that suits your budget? It includes choosing the city airline, hotel, and also the program and activities.

Planning is not only applied to events, it is also applied in marketing (marketing plan), business (business plan) and so on. An event plan is like any other plan, important to keep track of the budget, required tasks and activities.


Why Having an Event-Planning Checklist Is Important to Keep You Organized

Planning an event doesn’t need to be an overwhelming and frustrating task. If you know how to make things easy for yourself, planning an event can actually be fun and exciting. Undoubtedly, the number one thing you can do to ensure your event is planned properly is to create an event-planning checklist. A carefully planned checklist will ensure you stay organized, focused, and on task. Here are some of the most important reasons why:

A checklist clears your mind

There are so many things to think about when planning an event. If you try to keep all of your thoughts, ideas, and tasks in your head, you will easily become overwhelmed. Creating a detailed and organized checklist will allow you to get everything out of your head and onto a piece of paper.

The first step you should take when creating your checklist is to brainstorm and write everything that comes to your mind. Once this is complete, you can group tasks together and organize them. The perfect checklist is one that has all your tasks listed in order of importance.

A checklist allows you to organize all of your contacts

Your checklist should include tasks that involve communicating with your event contacts. When your checklist is organized properly, all of your contacts will be listed somewhere on your checklist. You won’t have to search for your contact’s information or wonder if you’ve contacted everyone to finalize arrangements. Everything will be right there on your checklist and you can mark it off when you’ve completed it.

A checklist helps you keep track of finances

Including finances on your checklist is a great way to keep track of how much money you spend when planning your event. You can make a checklist that includes finance estimates or exact numbers. When you make a payment, you can check it off and it will be marked as complete. If you have a separate accounting sheet, you can easily transfer all expenses from the checklist to the sheet because everything is listed and organized.

A checklist helps your employees/volunteers

If you have employees or volunteers that are helping you plan your event, a checklist can help them tremendously. They will know exactly what tasks are most important and what tasks they need to complete. Creating a group checklist that everyone has access to is a great way to ensure everyone knows tasks have been completed. You can use a computer program to help you create a group checklist or you can do it by hand. The only thing that’s really important is that you and your helpers are on the same page and able to communicate.

A checklist will allow you to enjoy your event

After you create a great checklist and follow it, you can sit back and relax knowing your event will be an amazing one. You’ll be able to enjoy your event without having to worry if you mistakenly forgot to take care of something. Your event will run smoothly and the attendees will be able to have a great time because everything will be taken care of. The piece of mind that a checklist can bring you is priceless.


How to Plan an Event: The Complete Event Planning Guide

Develop Your Event Goal and Objectives

The very first step in planning your event is to establish a tangible goal and objectives.  First, start by asking yourself: Why are you organizing this event, and what do you hope to achieve? If you know your organization’s key goals before planning, you can ensure that every part of your event is optimized for success. Are you trying to raise awareness for a cause, or collect a predetermined amount of donations for your next project? Are you hoping to attract 50 guests, or 500? Setting a goal with quantifiable metrics of success will make it easier for your team to ensure that you reach them.

Organize Your Team

Any event takes a concerted team effort to handle all the details. Consider identifying one key Event Manager or Event Chair as well as individual Chairpersons for subcommittees, such as:

  • venue management;
  • speakers;
  • entertainment;
  • publicity;
  • sponsors;
  • and volunteer management.

Assigning individual roles to team members creates a system of accountability, as well as preventing tasks from falling to the wayside. Plus, it’ll allow you to delegate – but don’t forget to account for committee meetings in your event plan timing!

Establish Your Budget

Establishing your event’s budget is one of the most important parts of planning an event. I’ve seen many great ideas fall by the wayside because the team who originally came up with it forgot to take their budget into consideration before beginning to plan.

Some of the critical expenses you need to include in your budget are:

  • Venue: This cost should encompass the rental as well as any insurance you need to purchase.
  • Food and Drink: This field is pretty self-explanatory. However, remember that the amount you can afford here might also dictate the number of tickets you’re able to sell.
  • Entertainment: This field can be customized however you need it to be — whether it’s allocated for speakers, a DJ, or even a talking pig, make sure you have wiggle room for travel and accommodation costs as well as any compensation.
  • Décor: Will you be going with a DIY mason-jar theme, or one that’s a little fancier? Establishing the costs upfront will help you determine which one you can afford.
  • Staff: This category might often be forgotten, but it’s key to account for the transportation and lodging costs of your staff, especially if you’re headed out of town. Even budgeting staff time (what would they be spending time on if they weren’t working on this event?) can help you decide whether that extra meeting is worth it.
  • Marketing: Whether you decide to promote your event through Facebook or go old-school by putting flyers up all over town


Event Planners Are Personable

What do all events have in common? People. Successful event planners are personable, engaging, good conversationalists, and excellent listeners. Event planning is a social profession in that the result – the event itself – will include a group of people, large or small. Understanding people and enjoying talking to them is part of the job.

This does not mean that, as an event planner, you will spend most of your day at client lunches and having cocktails at social events. Event planning is hard work, and much of it is spent at a desk with a phone or computer; however, a personable demeanor is a must when tackling one of these common event-planning tasks:

  • Negotiating with hotels
  • Discussing menus with catering managers
  • Meeting with vendors
  • Pitching your event ideas to a prospective client
  • Networking anytime and anywhere
  • Supervising event staff
  • Working your event and interacting with guests and workers

In daily life, most of us remember the pleasant, helpful people with whom we interact, and that interaction can make an experience much more constructive for both parties. Knowing how to relate to different personalities, how to connect with someone, and making a positive impression are keys to success. No one wants to work with or assist someone who is difficult to talk to, hard to understand or rude and unprofessional in any way, so consider being personable an essential event-planning skill.

Must Know How To Find The Best Djs

What You Need To Know About DJs

There are many different kinds of DJs, and many different reasons for those DJs to exist. Let’s start with getting serious about YOU: What kind of DJ are you interested in becoming?

The Club DJ

Each club has a different feel, reputation, and audience… which also means that clubs vary in what they expect from their musical selection. Typically, the job of the resident DJ at a night club is to maintain a moving dance floor. Often, club DJs will perform long blends (transitions) between songs, or some other trickery to keep people’s feet moving. This DJ must know how to ramp the energy up and down, and  maintain a balance between an active dance floor, and a busy bar.

The Performer (Turntablist)

People go to see this DJ because of who they are, their reputation, and what people think they can do behind the decks. Their mixes are displays of raw skill, impressive tricks, and clever transitions.

The “exhibitionist” DJs fit here, such as turntablists (e.g. those who focus on cutting and scratching), “controllerists”, and other types of live performers.

The Mobile DJ

These are the ones who perform at your wedding, set the tone for your corporate event, or provide a memorable prom party. Often the entrepreneurial type, mobile DJs have a lot of things to keep track of. In some cases, they are solely responsible for the setup and teardown of equipment, planning the show, managing the crowd, and making any announcements. This kind of DJ often needs to be comfortable with taking requests (and sometimes even entire playlists), speaking into a microphone, and investing in sound equipment.

The Radio DJ

The concept of the DJ owes it’s origins to radio. The radio DJ’s job varies greatly, from the person who announces the weather between songs, to full-on music curation. While many corporate radio DJs have lost control over the music, the art lives on in podcast format.


ELEMENTS OF DJING

The software described above will give you a large amount of control over various aspects or elements of the music you’re mixing. We’ve broken these down for you below:

Beatmatching

Sometimes referred to as “timestretching”, beatmatching involves manipulating the tempo and phase of songs so that they blend together. Tempo describes the speed of a song, while phase refers to the song’s beat. When beatmatching, the DJ adjusts the phase and tempo of two songs (using either controllers built into the software, or manually using external controllers) until they’re equal.

In the past, successful beatmatching required quick fingers and a trained ear. Fortunately, the development of high-tech (and often free!) digital software has made this far easier in recent years.

Tempo can be manipulated using a tool known as a pitch fader (included in most DJing software), which allows users to either speed up or slow down a track. You can adjust the phase by keeping an eye on the software’s phase meter, and simultaneously using DJ hardware such as a jog wheel (a moveable disk that looks like a record or disk) or your software’s pitch bend button to achieve the desired effect.

Phrasing

Phrasing is mixing at a point in the songs that makes sense from musical perspective. Most of the songs DJs mix are in 4/4 time, which means that there are 4 beats per bar (a “section” of music in a song). Usually major changes in a song occurs every 8 bars (e.g. shifting from the verse to the chorus), which also happens to be a great place to bring in another track.

While mixing, you will have to remain aware of the track’s time by counting, so that it sounds natural when you layer another song on top of it. This ensures you don’t add a new track (starting on the first beat) while the original song is on the second, third, or fourth beat of a bar—this will make for a choppy transition, causing the mix to play out of sync.

Volume/Gain Control

Most types of DJ software give the user control over several aspects or types of volume: signal volume, channel volume, and output volume. The diagram below depicts how sound is manipulated from the source to achieve the desired output, which is more or less the same process for both internal and external mixing. The knob labeled “3” is the signal volume, or the volume coming from the musical source.

EQing

Equalizing, also known as EQing, is the process of adjusting the frequencies (the pitch of the song—or how high or low the song sounds when it reaches our ears) of two tracks so that they fuse together in a complementary way. Without EQing, chances are your mixes will just sound like noise.


Basic Types of DJ Equipment:

The amount of DJ equipment options can be somewhat overwhelming for a beginner, especially since choosing the equipment is crucial to creating quality sounds. There are however a number of essential gear that a DJ needs to make killer playlists and provide your audience with enjoyment.

  1. Input devices

Putting tunes together requires at least two input devices, which can either be turntables or CD decks. You can choose from a wide range of input devices that will allow you to mix tunes and mashup tracks without a pause in music.

  1. Mixer

The mixer is the core part of any professional DJ setup. It is a type of audio mixing console that allows DJs to perform different effects and tricks. DJs use the mixer to make smooth transitions between different recordings while they are spinning a set. It can also be used to play record players.

  1. Headphones

High-quality headphones allow DJs to listen, cue, and mix tunes with precision. It is one of the most important tools for determining the right timing to play songs rhythmically. The equipment you use is based on your preference, but it is important to consider comfort as one of the main factors in choosing your headphones. You’re going to be wearing headphones for hours on end, so you want to use a pair that not only reproduces sounds accurately, but is also comfortable to wear.

  1. Sound system

Using studio monitor speakers is a great way for beginner DJs to hear their mixes with clarity. While Hi-Fi speakers produce high-quality sounds compared with inexpensive audio equipment, they also amplify certain frequencies that can make it difficult for beginner DJs to hear what the mix actually sounds like.

  1. Controller

Most modern DJs opt for a simpler (and easier) digital setup composed of a controller and a laptop. If you no longer use vinyl records or CDs, then purchasing a controller is really the only step you need to take to create a viable DJ setup.


GET TO KNOW YOUR DJ HARDWARE INSIDE AND OUT

Its all too easy to unwrap you new shiny DJ hardware and just start playing with all the buttons and dials and faders all at once! But you’ll never truly understand your mixer or decks unless you take your time to find out what each little tool can do. So slow down, pick a track you can loop for 20 minutes. pick one or two controls and see what they do.

See how creative you can get with just those controls in play. Once you feel you’ve mastered how to use them, move on to another pair. No piece of DJ hardware is perfect either, learn what shortfalls your system has or find out what shortfalls YOU have when trying to use it. It’ll help you identify areas you need to improve and also find solutions to the issues in your setup.


5 Laptop DJing Tips

  1. Know your software’s standalone capabilities

Not all laptop DJ software have the ability to be used as a fully functioning DJ app without a DJ controller or audio interface connected. Serato DJ, for instance, needs compatible hardware in order for it to be used for DJing. Furthermore, some software are more customisable than others: Virtual DJ 8 and djay Pro 2, for instance, have deep keyboard shortcut customisation features. Virtual DJ 8 even lets you create your own scripts and make tweaks to the engine code.

  1. Use the 80/20 rule with keyboard shortcuts

Learn the key commands for transport controls (play, cue, stop), find out how to toggle effects on and off, how to do full-kills on EQs, how to access hot cues, and so on. Basically, think of all the functions you use the most when you DJ on a controller, and then try to look for the keyboard shortcuts in your DJ software.

  1. Pack emergency accessories in your DJ bag

A splitter cable is crucial if you want to be able to preview and cue tracks. Splitter cables let you listen to your next track in your headphones without it playing on the main speakers. If you don’t need headphone cueing (say you’re just playing back tracks for a function), an 1/8″ to RCA cable will do. You’ll also want to try packing a small wireless mouse for more flexibility and if you prefer not to have your hands cramped up on the keyboard and trackpad.

  1. Sort your music and organise playlists ahead of time

Since you’re spinning and searching using the same input device (ie your laptop keyboard), you’ll want to be especially organised with your music so you don’t waste time going through your cluttered hard drive for tunes. Keep your playlists up to date and your DJ library sorted so your keystrokes / keyboard time is spent interacting with the music you’re playing instead of searching the dark recesses of your hard drive.

  1. Explore making your own mappings

You can also access more advanced features like samplers and performance pad features by making your own custom mappings – the trick is to have them easily accessible in your keyboard or via a Shift layer. Again, consult your software’s manual to learn where to find them.

Tips To Learn To Be Camera Operator

Film/​Television Camera Operator

Pay for film/television camera operators varies depending on experience and the type of production they are working on.

Entry requirements

There are no specific entry requirements to become a film/television camera operator. However, a relevant tertiary qualification in film, television or video production is useful.

Secondary education

There are no specific secondary education requirements to become a film or television camera operator. However, English, maths, media studies, digital technologies, drama and photography are useful.

Most camera operators are freelancers, and in a freelance world you live on the reputation of your last job. So you need to get on with the clients and production companies you work with

Physical requirements

Film/television camera operators need to have a good level of fitness as they stand for extended periods and carry heavy camera equipment. They also need to have good hearing and normal colour vision.


Camera operator jobs: What do they do? What do they get paid? How do I become one?

Camera operators play a vital role in filming TV, film and online productions and are in charge of – as you might have guessed – cameras. But what do camera operators do? What makes a camera operator stand out? How do you become a camera operator? What do camera operators get paid?

What do camera operators do? And who do camera operators work with?

Camera operators are responsible for operating a variety of technical equipment including mobile mounts and digital, electronic and film cameras. They work with the film’s director and director of photography to achieve the desired visual style of the production. Camera operators work in close collaboration with the camera department as well as occasionally engaging in dialogue with the actors.

When do camera operators start work?

Camera operators start working near the end of pre-production. While they sometimes have a hand in planning and preparing scenes, they are mostly responsible for making adjustments to the camera based on the elements affecting the shot after the director and DP block the scene.

Types of camera operators

There are a variety of camera operators who work across the world in countless capacities. Some capture music videos, others risk their lives in war-torn areas, some shoot sports and others work on movie sets.

Can I be a camera operator?

Camera operator certainly do a lot more than push buttons and it takes a lot of determination and resilience to become one. The job is physically demanding and usually takes place far from home, sometimes for weeks or months on end.


How to Hire a Camera Operator

A camera operator performs the most basic and essential function in any video production—making sure footage is captured. While a director is in charge of the creative vision of a production, the camera operator is the finely tuned instrument that gets the job done. Experts in angles, focus, motion, and lighting, camera operators know just how to carry out a director’s grand ideas and turn them into a reality. Hiring a quality freelance camera operator will make any simple production look professional and outstanding.

What to Look For

No matter what their credentials are, freelance camera operators will have a showreel to display their talent—education matters little compared with showing actual work. When you sit down to interview a potential freelance camera operator, you should be looking for a couple specific things in his or her showreel

Know What You Need

Since freelance camera operators essentially work to carry out someone else’s ideas, they won’t require much beforehand such as a script or a meeting with the cast members. If you want to have all your bases covered however, you’ll want to ask them if they have all their own equipment or if you will need to provide any. Part of this comes down to the types of shots you want them to capture. For instance, a good freelance camera operator should have his or her own camera and simple crane jibs.

How are the shots focused?

Almost the entirety of a freelance camera operator’s job consists of taking clear, focused shots. The creative direction of the reel isn’t really important here, whether it is good or bad. If the shots are focused well, telling the visual story that should be flowing naturally, chances are you’ve found a good freelance camera operator.

How does the camera track movement?

Capturing motion is another quality you should look for. If the movement does not stay properly framed throughout the shot, you may want to look for someone else.


How to become a Film and Television Camera Operator

Education & Training for a Film and Television Camera Operator

To become a film and television camera operator you usually have to complete a VET qualification. Applicants may be required to attend an interview and/or submit a folio of work. As subjects and prerequisites can vary between institutions, you should contact your chosen institution for further information. You can also become a film and television camera operator through a traineeship in Media. Entry requirements may vary, but employers generally require Year 10. Alternatively, you can become a film and television camera operator by completing a degree in creative arts, media, screen production, or film and television. To get into these courses you usually need to gain your Senior Secondary Certificate of Education with English. Applicants may be required to attend an interview and/or submit a folio of work. Institutions have different prerequisites and some have flexible entry requirements. Contact the institutions you are interested in for more information.

Working conditions for a Film and Television Camera Operator

Film and television camera operators work as part of a team and are often required to work long and irregular hours, including nights and weekends. They may need to travel to remote areas. Work can take place indoors and outdoors.

Employment Opportunities for a Film and Television Camera Operator

Camera operators may be employed by television broadcasters and film companies. The demand for camera operators depends on levels of investment in film and television production, as well as the introduction of new technology. Competition for entry-level positions is strong and people appointed have usually been employed in some other aspect of film and television production. Promotion to the level of camera operator depends on demonstrated skills and proficiency, as well as full knowledge of the various types of cameras used.

Specializations

A director of photography oversees the lighting and camera crew in the film production unit. They instruct camera operators on camera set-up, angles, distance and movement, then signal cues to start and stop filming. After each day’s filming, the director of photography checks the ‘rushes’ (the scenes shot that day) and decides whether re-filming is necessary.

Film and Television Camera Operator

Film and television camera operators set up, position and operate equipment in studios or on location to photograph or record people, events and scenes. Film camera operators use 16mm and 35mm film cameras or digital video for motion pictures, whereas television and video camera operators use cine-electronic television or digital video and video cameras for direct telecast and recording.


FILM CREW RULES FROM A VETERAN CAMERA OPERATOR

Get out before you get in.

Simply loving movies is not enough to sustain anyone for decades of long days, missed holidays, and unpredictable income. If any skill other than filmmaking comes easily to you go for that. It will probably be an easier life path than the film slog. If this is your only calling, welcome to the club.

Put the silver marker & Criterion DVD away.

A strong work ethic and set etiquette is extremely important when working around strangers and celebrities. Asking for photos or signatures on-set is distracting and unprofessional. Pro Tip: The sooner you can get comfortable acknowledging famous people as simply other human beings, the closer you are to really learning something interesting about them.

One of those Production Assistants will be your boss someday.

Treat all crew members with respect. People move quickly in the film industry:  today’s PA might be tomorrow’s Executive Producer. Bring Your A-game to every job because it’s habit forming and you never know who’s watching. Pro tip: use a printed call sheet on-set rather than using your distracting phone.  Even if you’re doing work and checking the call sheet on your phone, other people on set who see you staring down at the screen might think you’re texting. With a printed call sheet there’s no question that you’re focused.

Don’t dress like a pirate.

Working in an industry without a dress code is great, but it’s no excuse to look and act like a salty sailor. Inspire confidence in your employers with your appearance and communication. If you’re new, a clean shave (for the dudes) or neat hairdo (for the gals) and a collared shirt is a good start.  The idea here is that if something goes wrong on set and the Director or Producer is pissed off and looking around for someone to blame you want them to look at you and see a calm, cool, professional. Your clothes and appearance can make the difference.

Never back out of a shoot.

Freelancers naturally develop a mercenary instinct to follow the highest bidder.  But a key to long-term survival in film production is to value your relationships with good people more than a big paycheck. Never sign up for a shoot and then skip our in favor of a larger paycheck.  Doing that is the best way to make enemies and build a bad reputation. Pro Tip: Expect loyalty on both sides of the relationship. A boss who will fight for your rate is worth following.

Make The Best Party Bus In Your Life

Tips for choosing the best Party Bus

A wonderful fleet:

All the coaches that come in this fleet are motor coaches and buses. These come at a length of 40 to 45 feet. Any bus that is less than 40 feet is not the kind that will offer you the best of comfort. This is one important criterion to keep in mind whilst hiring a bus. Buses that are less than 40 feet in length will not offer you the best of comfort. Their driving characteristics are also different compared to the other bigger vehicles.

Wide selection:

You can select a mini-bus if you are a group of 20 to 30 and for larger groups, say between 45 and 60, you can opt for the motor coaches and passenger buses. These forms of travel offer you the best in safety, comfort and other driving characteristics.

Ergonomically designed:

These buses are constructed with passenger comfort in mind. The seats are made of plush leather to offer optimum comfort. They are ergonomically designed to give your spine, back and neck muscles the right kind of support. There is enough leg space so that you do not feel cramped. The luggage space is enough to carry all your cargo with the greatest of ease. No ride is as smooth as that of a party bus. The seating layout is optimized for comfort and provides the passengers with the most delightful of traveling experiences.

Safety measures:

The weight and the size of these vehicles make them far easier and one of the safest of options to ride around in. The trained drivers will take care of all the safety regulations. Moreover, you will not to have to worry about paying any tolls, parking fees, or any other fees as all of this will be taken care of by the driver.

Utmost comfort:

Most of the coaches have a washroom in them. This is certainly a huge bonus. You will love the feeling of being able to travel in such plush comfort.


Tips On Choosing The Right Party Bus For Hire

Check on the reputation of the party bus companies

Prior to using a particular service operator you really want to make certain to do your due diligence to check the company is able to supply a well equipped and maintained vehicle, which comes with a sufficiently licensed and experienced driver.

On board Amenities & packages

In Sydney not all party buses are equipped with leather seats, custom bar, 3D stereo sound system, LED TVs and many more. These buses also allow you to bring alcoholic beverages, food and also your entertainment. It provides so much fun that you may never want to stop the ride! Know more about the packages to click the link below.

VIP Service in Sydney, Parramatta and other regions

Forget about waiting in line to get into the hottest clubs in the town. With your chauffeurs to lead the way, you will move to the front of the line every time. They also provide VIP entry to the club without even a pass. Now how cool is that!

Cost-effective

You can have a safe transportation as well as ample entertainment when you are on board. Moreover, it doesn’t cost you a fortune to experience this. If you happen to travel in a group of friends and divide the rates, the cost is even more affordable.


How to Choose Party Bus for Your Event

Understand the bus rental prices

When you are planning to hire a bus for your occasion, you need to be familiar or at least have a clue of the possible cost. Party busses differ in price depending on their size, luxury, and the design. Choose a favorable party bus that charges fairly based on the hours you will travel.

Select your music and refreshments

Before you book a party bus, you need to discuss with the company if you are allowed to play your music using their systems. Remember it is a party bus. Therefore you need to find a bus that you will be allowed to be selective in your music.

Capacity to can accommodate

It is important to determine the capacity that the party bus can accommodate. Some party bus rental has a maximum capacity to accommodate. You will, therefore, be charged an extra fee for the extra seats. The bus party rentals have different size of party buses; you need to select one that can accommodate a good number. You are also supposed to book some extra seats in case you are expecting some visitors.

Is the party bus company licensed?

You will be required to deal with a licensed and insured company and to ensure you are safe to travel. This is important in the case of an accident; the company should be able to cater for your lose. You should insist on checking the license of the company and driver together with the insurance cover to ensure they are genuine. This will help you build trust on the company’s service that they will provide to you.


Tips To Get The Most Out Of Your Party Bus Rental

Pick Your Route

Are you going to have a simple trip from Point A to Point B, or are you going to plan several stops at various places along the way? You will need to inform the party bus company about the route since many of them charge for fuel. Plan the itinerary beforehand and let the company know of it in order to inform your chauffeur.

Make Sure You Understand Party Bus Rental Prices

Every company has its own payment structure. Hourly or flat rate the prices will vary. Make sure you understand any additional charges like fuel or any other costs. As an advice, check just to be sure that they do not have any hidden payments that you will discover after the rental. Ask about the policy and how much you will be charged if you go over the time you initially settled. The price stated in the contract will be the final sum you will have to pay for the services you requested.

Pick Your Party Bus

Make sure you select the vehicle that fits your event. If you do not check the details, you may not have the elegance you are wishing for, so make sure to inspect the vehicles before you decide. When you check your party bus, verify every light and inspect every electronic device. If the bus is not in a perfect shape, move on or report the malfunctions so you will not be charged for them, or you can negotiate a lower price.

Make Party Bus Rental Reservations

You should reserve a month in advance and confirm the reservation within a week before the event. Even if you are planning to rent a party bus for a wedding or another event that does not have a flexible date, the reservation should be made as far as a year before.

Select Your Refreshments

The fun part of renting a party bus is that you can party while on board. Speak with the company about its policies and contribution for food and beverages. Some of the companies will let you bring your own food and beverages.


Tips for Choosing Your Party Transportation

Which Vehicle Is Right For My Event? Things to Consider

While the first limousines only had a seating capacity of four people, today, limos and other party vehicles can hold 60 passengers or more. Even big events with many attendees can be managed with a few large modern party buses.

Do a Head Count

The first step in determining what party vehicle you need is to figure out how many people will need transportation. Generally, stick to the plus-three rule. If the number of passengers anticipated is ten, look for a vehicle that has seating for at least thirteen. That way, any extra stragglers you pick up along the way will have a chance to tag along. Even if your party doesn’t grow by one or two, your passengers will appreciate the extra leg room.

Other Considerations

Though it would be nice to plan an event with an unlimited budget, do keep expenses in mind when planning a party bus rental. Regular motor coaches, school buses, and luxury coaches all can carry about the same number of people, so choose the level of comfort that fits your price range and your event.